

I'm a tabletop game developer, and enjoy making apps that have the potential to perform some service related to gaming. In this article, we'll walk through the steps to create a roleplaying game character generator using MongoDB, Express, Vue, and Node (also known as the "MEVN" stack).
Prerequisites: this tutorial presumes that you have Node/NPM and MongoDB installed and configured, with a code editor and CLI (or IDE) ready to go.
If you'd prefer to follow along with a visual tutorial, you can check out the companion video to this article below:
I should also mention that this tutorial would not have been possible without Bennett Dungan's article on building a REST API, Aneeta Sharma's tutorial on full stack MEVN web apps, and Matt Maribojoc's article on the same topic.
I used each of these articles in addition to official documentation (for Vue, Express, and a whole lot more) in learning to create my own MEVN apps (you can read more about my journey with web APIs here).
You can access the entire repository for this tutorial on GitHub.
The Front End
Our app is going to allow us to create new roleplaying game characters and view them altogether, with the following stack:
- Vue Client
- Node/Express Server
- MongoDB Database
The Vue Client will make HTTP requests to the Node/Express Server (or "API"), which will in turn communicate with our MongoDB Database to send data back up the stack.
We'll begin by opening a command line, creating a new directory for our project, and navigating into that directory:
mkdir mevn-character-generator
cd mevn-character-generator
We'll then install the Vue CLI globally to help us scaffold a basic app:
npm install -g @vue/cliNext, we'll use the Vue CLI to create a new app called "Client" within our mevn-character-generator directory:
vue create clientYou can just hit "enter" at the prompt to keep going.
We can run our app by first navigating into the /client folder:
cd client
npm run serve
When the script has completed running, we can now open a browser page and navigate to the URL indicated by our terminal (usually http://localhost:8080 or 8081). We should see something like this:
Nice! The Vue CLI has scaffolded a basic app for us, and is rendering it right into the browser. It'll also reload the page automatically upon file changes, and throw errors if something in the code looks amiss.
Let's open the project directory in our code editor to take a look at the file structure, which should look like this:

If you're OCD like I am, you can go ahead and delete the "favicon.ico" file and "/assets" folder as we won't need them for this project.
Diving into /src/main.js, we see:
import Vue from 'vue'
import App from './App.vue'

Vue.config.productionTip = false

new Vue({
  render: h => h(App),
}).$mount('#app')
This file is the main entry point for our client. It tells the browser to mount our App.vue file to the div with id "#app" in /public/index.html.
Let's look at /src/App.vue (I've omitted some code for readability):
<template>
  <div id="app">
    <img alt="Vue logo" src="./assets/logo.png">
    <HelloWorld msg="Welcome to Your Vue.js App"/>
  </div>
</template>

<script>
import HelloWorld from './components/HelloWorld.vue'

export default {
  name: 'App',
  components: {
    HelloWorld
  }
}
</script>

<style>
#app {
...
}
</style>
App.vue is a typical Vue component, with <template>, <script>, and <style> tags.
The section between the <template> tags is the HTML that we see rendered on the screen. Within, we see a reference to the image that we deleted, and a <HelloWorld/> component that is being fed the message "Welcome to Your Vue.js App."
The <script> section imports other components that are in use, and exports any data that we want to include in our app. Note that in App.vue, we're importing HelloWorld.vue from another directory, and exporting it as a component so that our main.js can have access to it.
The <style> tags are for your own brilliant and vibrant CSS, which we won't be using for this tutorial (womp womp).
Let's follow the thread to /src/components/HelloWorld.vue:
<template>
  <div class="hello">
    <h1>{{ msg }}</h1>
...
  </div>
</template>

<script>
export default {
  name: 'HelloWorld',
  props: {
    msg: String
  }
}
</script>

<!-- Add "scoped" attribute to limit CSS to this component only -->
<style scoped>
...
</style>HelloWorld.vue follows a similar component structure to App.vue. It expects to receive the props "msg" as a String from the parent component that calls it (which is in this case App.vue). HelloWorld.vue then serves the message directly into the HTML template between the curly braces as {{msg}}.
It's also important to note that the <style> tags here (which we're still not using) are scoped, meaning that if you wanted to apply CSS to this component alone, you could do so.
Let's delete all the HTML in HelloWorld.vue and change the name of the file to "CharacterViewer.vue." Update the code to:
<template>
    <div class="character-viewer">
        <h1>Character Viewer</h1>
    </div>
</template>

<script>
    export default {
        name: 'CharacterViewer'
    }
</script>

<style scoped>

</style>
That's much simpler, but it requires us to change all references to "HelloWorld" in App.vue:
<template>
  <div id="app">
    <CharacterViewer />
  </div>
</template>

<script>
import CharacterViewer from './components/CharacterViewer.vue'

export default {
  name: 'App',
  components: {
    CharacterViewer
  }
}
</script>
The Vue CLI, which may have been throwing you errors while deleting and re-arranging stuff, should reload. If you check out your browser again, you'll see:

Pretty exciting. Let's add a "Character Creator" component by duplicating CharacterViewer.vue and calling it "CharacterCreator.vue", replacing the code:
<template>
    <div class="character-creator">
        <h1>Character Creator</h1>
    </div>
</template>

<script>
    export default {
        name: 'CharacterCreator'
    }
</script>

<style scoped>

</style>
Then reference our new component in App.vue:
<template>
    <div id="app">
        <CharacterViewer />
        <CharacterCreator />
    </div>
</template>

<script>
    import CharacterViewer from './components/CharacterViewer.vue'
    import CharacterCreator from './components/CharacterCreator.vue'

    export default {
        name: 'App',
        components: {
            CharacterViewer,
            CharacterCreator
        }
    }
</script>
Cool. Now the website should show us:
That's great, but let's say that we want to dynamically view each of the components independently of one another. We could use radial menus as selectors that will guide the logic of our app, but I'm partial to using buttons when creating a user interface.
Let's add a couple:
<template>
    <div id="app">
        <button v-on:click="toggle='character-viewer'">View all characters</button>
        <button v-on:click="toggle='character-creator'">Create a character</button>
        <CharacterViewer v-show="toggle==='character-viewer'" />
        <CharacterCreator v-show="toggle==='character-creator'" />
    </div>
</template>

<script>
    import CharacterViewer from './components/CharacterViewer.vue'
    import CharacterCreator from './components/CharacterCreator.vue'

    export default {
        name: 'App',
        components: {
            CharacterViewer,
            CharacterCreator
        },
        data: function () {
            return {
                toggle: "character-viewer"
            }
        }
    }
</script>
To understand the above code, let's work our way from the bottom of the script upwards.
We've added a "data" function to the export section of our app, which returns an object that can store data for us. This data can in turn help us manage the state of the app. In this code, we've created a "toggle" that's set to "character-viewer."
In the HTML template above the script, we've created two buttons: one to "View all characters" and the other to "Create a character." The attribute "v-on:click" within the <button> tags tells Vue that when clicked, Vue should change the value of "toggle" to "character-viewer" or "character-creator," depending on which button is being clicked.
Just below the buttons, the "v-show" directives instruct Vue to only show the "CharacterViewer" component if "toggle" is equal to "character-viewer", or the "CharacterCreator" component if it's equal to "character-creator."
Congrats, our app now renders content dynamically based on user input!
Now, we can move to creating the basic structure for viewing and creating roleplaying game characters. In CharacterCreator.vue, update the code:
<template>
<div class="character-creator">
<h1>Character Creator</h1>
<label for="character-name">Character Name: </label>
<input type="text" id="character-name" v-model="name" placeholder="Enter a name" /> <br /><br />
<label for="professions-list">Character Profession: </label>
<select id="professions-list" v-model="profession">
<option value="Mage">Mage</option>
<option value="Thief">Thief</option>
<option value="Warrior">Warrior</option>
</select>
<p>{{name}}</p>
<p>{{profession}}</p>
</div>
</template>
<script>
export default {
name: 'CharacterCreator',
data: function () {
return {
name: "",
profession: ""
}
}
}
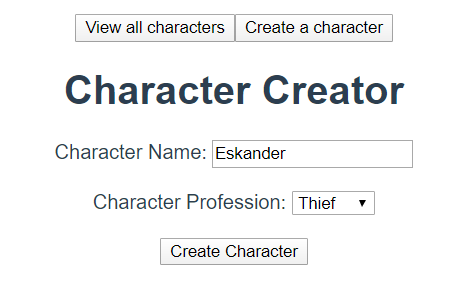
</script>We've just created a text input where players can input a character name, and a simple dropdown list from which they can choose a profession.
The "v-model" attribute binds each of those inputs to the "name" and "profession" values in our data object within the script.
We've also temporarily added a {{name}} and {{profession}} into the HTML template so that we can make sure that everything's working properly. Upon saving, the Vue CLI should automatically re-render the app to look like this when clicking on "Create a character":
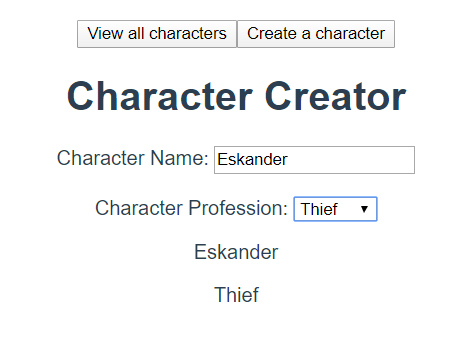
It's certainly not pretty, but it works! I'll leave the design up to your mad CSS skills.
The Back End
Let's move to the back end. Open a new command line and navigate to the root directory (mevn-character-generator). Create a new directory for our server and navigate into it:
mkdir server
cd server
Now initialize the directory:
npm initYou can just keep hitting "enter" at the prompts if you don't care to change any of the specifics.
Then install our dependencies and save them to the project:
npm install --save express dotenv nodemon mongoose corsLet's take a second to look at each of these items in turn. Express is going to serve as the main back end web framework, while dotenv allows us to declare certain environment variables that will help us with pathing and configuration. Nodemon automatically watches our server for changes and restarts it for us, and Mongoose serves as an ODM to map our data onto MongoDB. Finally, CORS allows us to make cross-origin requests between our client and server, a topic I've written about here.
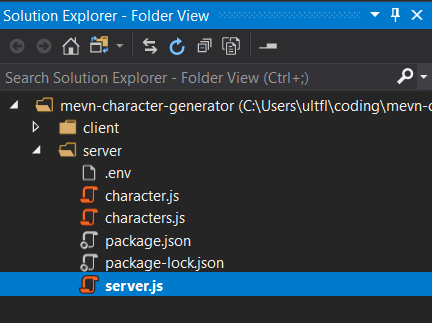
That's a lot of dependencies! Back in our code editor, we need to create a few files and directories to scaffold a server with which to work. In our new /server directory, create four files called "server.js", ".env", "characters.js", and "character.js":
Replace the "test" script in our package.json with the "dev" one below:
{
  "name": "server",
  "version": "1.0.0",
  "description": "",
  "main": "index.js",
  "dependencies": {
    "cors": "^2.8.5",
    "dotenv": "^8.2.0",
    "express": "^4.17.1",
    "mongoose": "^5.9.3",
    "nodemon": "^2.0.2"
  },
  "devDependencies": {},
  "scripts": {
    "dev": "nodemon server.js"
  },
  "author": "",
  "license": "ISC"
}
Now, when we type "npm run dev" in the command line, it'll run Nodemon with server.js as the entry point for the back end of our app.
We'll create our server by adding the following code to server.js:
require('dotenv').config();
const express = require('express');
const server = express();
const cors = require('cors');

server.use(express.json());
server.use(cors());

server.get("/", (req, res) => {
    res.send("Hello World!");
})

server.listen(3000, () => console.log("Server started!"));
We're doing a lot here up front, but we'll thank ourselves later. First, we're importing any environmental variables that we'll need for running our development server, as well as Express and CORS. We're creating a server that runs on Express and is able to parse JSON and use CORS.
Then, we're telling the server that when a user navigates to the root directory ("/") in a browser, they should be sent the message "Hello World!"
Finally, we tell the server to listen on port 3000, and log to the console that the "Server started!"
Type the following in a separate command line from the one running our Vue app, making sure you're in the /server directory:
npm run devOpen a browser to http://localhost:3000. You should see:
Neat!
Now that the server's up, we need to get our database working. Open a third command line and type in the following:
mongodThis should get our database running, but will depend on how you installed and configured MongoDB before tackling this tutorial. In some cases, you'll need to work with the path of your database and of MongoDB itself to get it all square.
Once the "mongod" command is working, add the following line to your .env file:
DATABASE_URL = mongodb://localhost/charactersWe'll use the above in a second as we hook up our database. Add the following code to your server.js file, just under the line about requiring CORS:
const mongoose = require('mongoose');
mongoose.connect(process.env.DATABASE_URL, { useNewUrlParser: true });
const db = mongoose.connection;
db.on('error', (error) => console.error(error));
db.once('open', () => console.log('Connected to database!'));
Here, we're importing Mongoose into our server, and connecting it to the DATABASE_URL that we declared in the .env file.
This connection is assigned to the "db" variable for easy reference, and if there's an error, we've asked the server to log it to the console. Otherwise, if everything's working correctly, the console should log that we're "Connected to database!"
Save all of your files, allowing Nodemon to restart the server with the CLI messages that the "Server started!" and that you're "Connected to database!"
Now that everything's wired up on the back end, we'll need to add a Mongoose "schema," which is a model of what our data should look like. Add the below to character.js:
const mongoose = require('mongoose');

const characterSchema = new mongoose.Schema({
    name: {
        type: String,
        required: true
    },
    profession: {
        type: String,
        required: true
    }
});

module.exports = mongoose.model('Character', characterSchema);
After importing Mongoose, we've added a new schema that maps the character name and profession that we've created in our front end client to the requisite fields in the back end database. Both are of type "String," and are required when posting to the database.
We need to tell the server how to access the database and what to do once it's there, but it'll get messy if we try to add all of that code to server.js. Let's delete the code block that begins with "server.get..." and replace it with:
const router = require('./characters');
server.use('/characters', router);
This snippet just says to the server, "when someone goes to the /characters HTTP endpoint, do whatever's in the characters.js file."
Your entire server.js file should now look like the following:
require('dotenv').config();
const express = require('express');
const server = express();
const cors = require('cors');

const mongoose = require('mongoose');
mongoose.connect(process.env.DATABASE_URL, { useNewUrlParser: true });
const db = mongoose.connection;
db.on('error', (error) => console.error(error));
db.once('open', () => console.log('Connected to database!'));

server.use(express.json());
server.use(cors());

const router = require('./characters');
server.use('/characters', router);

server.listen(3000, () => console.log("Server started!"));
Note: it's a best practice to keep your models and routes in "/models" and "/routes" folders, respectively, but we've simplified the paths for this tutorial.
Let's get that characters.js file working. Start by entering the following:
const express = require('express');
const router = express.Router();

router.get('/', (req, res) => {
    res.send("Hello World!")
});

module.exports = router;
If we navigate to http://localhost:3000/characters, we get the "Hello World!" message that we saw previously. Not too shabby – we've successfully migrated our code to a separate file to keep things a bit more tidy.
Adding a bit more to characters.js will help us fill out the remainder of our back end API, but let's pause for a moment to consider what we're attempting to do.
In this project, we want to be able to make GET and POST requests from the client to the server, which will in turn "Read" from and "Create" items in the database (representing the "R" and "C" in "CRUD"). We'll start with the GET method as we already have a structure for it:
const express = require('express');
const router = express.Router();
const Character = require('./Character');

router.get('/', async (req, res) => {
    try {
        const characters = await Character.find();
        res.json(characters);
    } catch (err) {
        res.status(500).json({ message: err.message });
    }
});

module.exports = router;
We're creating an asynchronous function that, when it receives a request, attempts to find all Characters in our database that fit our Mongoose schema. It then sends them all back up the stack as a JSON response. If something goes awry, it instead sends a 500 error.
Reloading the page that we have open on http://localhost:3000/characters will return an exciting "[]", but that's great! It just means that the GET request is returning an empty array because the database is empty. Good job!
Wiring the Front End and Back End
Let's return to our client! In a command line at the mevn-character-generator/client directory, install Axios:
npm install --save axiosAxios allows us to make HTTP requests from within our client. If you're interested, you can read more about how it works with Vue here.
Back in our /client/src/components/CharacterViewer.vue file, we need to make GET requests to the server so that we can pull characters from the database, and we'll do so using Axios:
<template>
    <div class="character-viewer">
        <h1>Character Viewer</h1>
        <p>{{characters}}</p>
    </div>
</template>

<script>
    import axios from 'axios'

    export default {
        name: 'CharacterViewer',
        data: function () {
            return {
                characters: null
            }
        },
        methods: {
            getCharacters: function () {
                axios
                    .get('http://localhost:3000/characters')
                    .then(response => (this.characters = response.data))
            }
        },
        mounted: function () {
            this.getCharacters();
        }
    }
</script>

<style scoped>
</style>
In the script section, we've created a data variable called "characters", which starts out as "null."
In our "methods" object, which is where Vue stores functions that you can use throughout your component, we've created a "getCharacters()" function. "getCharacters()" will call Axios to GET the http://localhost:3000/characters endpoint and store the data of its response in the "characters" variable.
When the component is mounted for the first time, it will run "getCharacters()" to GET all characters from the database and display them within the HTML in the template section above.
We still won't see anything exciting on our client page (still rendering at http://localhost:8080 or 8081) because we haven't added any characters to the database yet.
Pro tip! If you're nervous about this step and not sure if things are working correctly, you can use a third party app like Postman to make HTTP requests to an API without having to first wire up your client.
Let's jump back to our /server/characters.js router and add logic for a POST request:
const express = require('express');
const router = express.Router();
const Character = require('./Character');

router.get('/', async (req, res) => {
    try {
        const characters = await Character.find();
        res.json(characters);
    } catch (err) {
        res.status(500).json({ message: err.message });
    }
});

router.post('/', async (req, res) => {
    const character = new Character({
        name: req.body.name,
        profession: req.body.profession
    });
    try {
        const newCharacter = await character.save();
        res.status(201).json(newCharacter);
    } catch (err) {
        res.status(400).json({ message: err.message });
    }
});

module.exports = router;
Below the GET request, we've added an asynchronous POST function that creates a "character," which is a new copy of the Character.js Mongoose schema. The request that comes to the server should include a "name" and "profession" in the body, which should be saved into the database as a "newCharacter" and returned as the JSON response with a 201 success.
If there's an error, the server should send it up the chain with a status of 400.
Crazily enough, this code is all we need to wrap up the back end of our app. If we head to our /client/src/components/CharacterCreator.vue file, we can tie everything together:
<template>
    <div class="character-creator">
        <h1>Character Creator</h1>
        <label for="character-name">Character Name: </label>
        <input type="text" id="character-name" v-model="name" placeholder="Enter a name" /> <br /><br />
        <label for="professions-list">Character Profession: </label>
        <select id="professions-list" v-model="profession">
            <option value="Mage">Mage</option>
            <option value="Thief">Thief</option>
            <option value="Warrior">Warrior</option>
        </select><br /><br />
        <button v-on:click="postCharacter">Create Character</button>
    </div>
</template>

<script>
    import axios from 'axios';

    export default {
        name: 'CharacterCreator',
        data: function () {
            return {
                name: null,
                profession: null
            }
        },
        methods: {
            postCharacter: function () {
                axios
                    .post('http://localhost:3000/characters', {
                        name: this.name,
                        profession: this.profession
                    });
            }
        }
    }
</script>
We've added a "postCharacter()" function to the CharacterCreator.vue component, which will send a POST request to http://localhost:3000/characters endpoint with a "name" and "profession" in the body.
The "name" and "profession" are drawn from the variables within our data object, which are themselves bound to the inputs that we created earlier by the "v-model" attribute.
We've added a "Create Character" button that calls the "postCharacter()" function when clicked. When we make a POST request using the character creator, we can now do this:
And our GET request looks like:
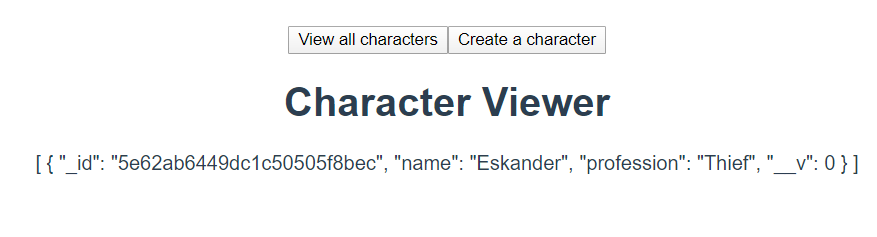
IT'S WORKING. But we need to clean up our GET request so that it's more readable, especially when new users are added. Here's what we'll add to the <template> portion of CharacterViewer.vue:
<template>
    <div class="character-viewer">
        <h1>Character Viewer</h1>
        <p v-for="(character, index) in characters" v-bind:key="index">{{character.name}} is a {{character.profession}}!</p>
        <button v-on:click="getCharacters">Refresh Characters</button>
    </div>
</template>
Here, we're using "v-for" to ask Vue to iterate over each of the characters in the response data (currently stored in the "characters" variable) and display their names and professions.
The Vue CLI will get irritated if you don't provide a unique key for each of the iterated items, so we use "v-bind" to create a key based on the item's index.
We've also added a "Refresh Characters" button that will call the "getCharacters()" function so we can see new characters as they're added without having to refresh the page.
The Character Viewer looks a lot cleaner:
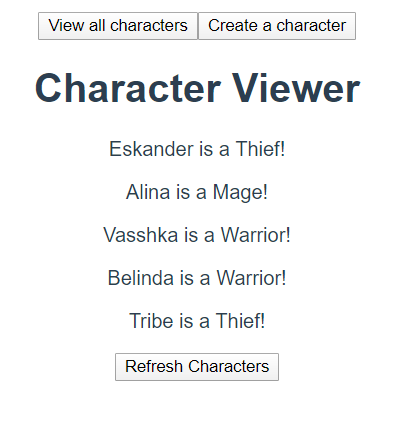
And with that, our app is fully functional! Great job!
...
...
But what if we want to eliminate that "Refresh Characters" button and just have all characters load whenever we navigate to the Character Viewer section of the app?
First, we'll need to make these changes to App.vue:
<template>
    <div id="app">
        <button v-on:click="toggle='character-viewer'; getCharacters()">View all characters</button>
        <button v-on:click="toggle='character-creator'">Create a character</button>
        <CharacterViewer v-show="toggle==='character-viewer'" :characters="characters"/>
        <CharacterCreator v-show="toggle==='character-creator'" />
    </div>
</template>

<script>
    import CharacterViewer from './components/CharacterViewer.vue'
    import CharacterCreator from './components/CharacterCreator.vue'
    import axios from "axios"

    export default {
        name: 'App',
        components: {
            CharacterViewer,
            CharacterCreator
        },
        data: function () {
            return {
                toggle: "character-viewer",
                characters: null
            }
        },
        methods: {
            getCharacters: function () {
                axios
                    .get('http://localhost:3000/characters')
                    .then(response => (this.characters = response.data))
            }
        },
        mounted: function () {
            this.getCharacters();
        }
    }
</script>
We've migrated the "getCharacters()" functionality to App.vue and are now calling it when the app is mounted, as well as whenever we click on the "View all characters" button. We're also passing the "characters" variable - which is storing our response data from the server API - as props to the "CharacterViewer" component in the <template> section.
All that's left is to clean up CharacterViewer.vue and indicate that it should expect an Array called "characters" as props:
<template>
    <div class="character-viewer">
        <h1>Character Viewer</h1>
        <p v-for="(character, index) in characters" v-bind:key="index">{{character.name}} is a {{character.profession}}!</p>
    </div>
</template>

<script>
    export default {
        name: 'CharacterViewer',
        props: {
            characters: Array
        }
    }
</script>
WE'VE DONE IT.
We've created a fully functional roleplaying game character generator. Its Vue client responds dynamically to user input, and can make GET and POST requests to a Node/Express server API, which in turn reads from and writes to a MongoDB database.
Well done. You can use this project as a template for your own MEVN full stack apps, or work with the HTML and CSS to make it more feature-rich and user friendly.
A fun next step would be to research RESTful APIs in more depth and add PATCH and DELETE requests so that you can update or delete characters as necessary. A helpful starting point would be the Express documentation, or Bennett Dungan's article on building a REST API.
You can also learn how to deploy this kind of app to Heroku here.
Happy coding!
If you enjoyed this article, please consider checking out my games and books, subscribing to my YouTube channel, or joining the Entromancy Discord.
M. S. Farzan, Ph.D. has written and worked for high-profile video game companies and editorial websites such as Electronic Arts, Perfect World Entertainment, Modus Games, and MMORPG.com, and has served as the Community Manager for games like Dungeons & Dragons Neverwinter and Mass Effect: Andromeda. He is the Creative Director and Lead Game Designer of Entromancy: A Cyberpunk Fantasy RPG and author of The Nightpath Trilogy. Find M. S. Farzan on Twitter @sominator.